Initialize AGIOne ClusterD
AGIOne ClusterD is a service for managing multiple Kubernetes clusters. It supports the rapid installation of Kubernetes clusters and activation of related components.
AGIOne ClusterD supports the following operating system environments:
- Linux: x86_64 and arm64; common distributions such as Ubuntu 22.04, Ubuntu 20.04, and CentOS 7 are supported.
- MacOS: i386 (Intel-based Macs).
Note: Default port is 8080. If another port required, change addr item from config/config.yaml file.
Installation
1. Download the installation package
2. Extract and start AGIOne ClusterD
Extract the package, enter the extracted directory, and run one of the following commands:
bash start.shOr run it in the background:
nohup bash start.sh > clusterd.log 2>&1 &Onboard a Compute Cluster
Onboard compute nodes
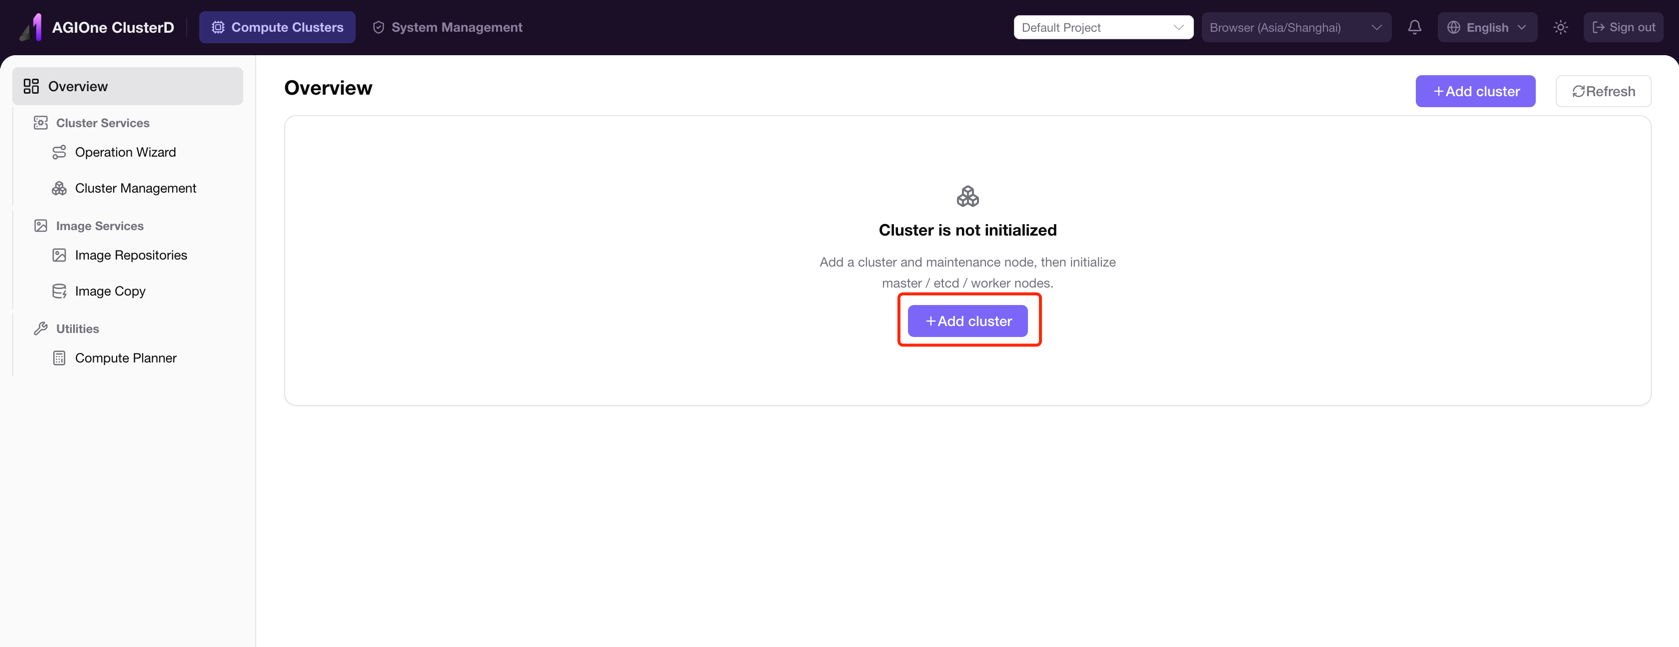
Add a cluster
- The default login account is
admin. Log in with theadminaccount. - After logging in, click Add Cluster.
Configure the Maintenance node
Note: The Maintenance node is used to manage the agent nodes in the cluster. It can be one of the compute cluster nodes. The Maintenance node primarily receives commands from the user interface and executes them locally.
Enter the cluster name and SSH connection credentials as required, and configure Network mode. Select Offline maintenance only when the nodes being onboarded cannot access the Internet.
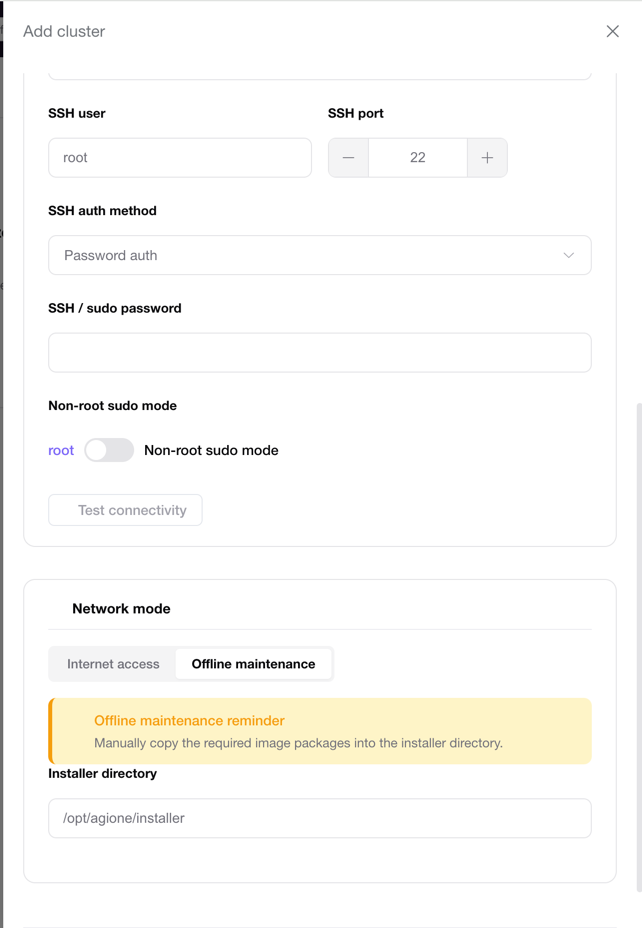
After the configuration is complete, save it. In online mode, ClusterD automatically downloads and extracts the cluster configuration and installation package.
Initialize the cluster
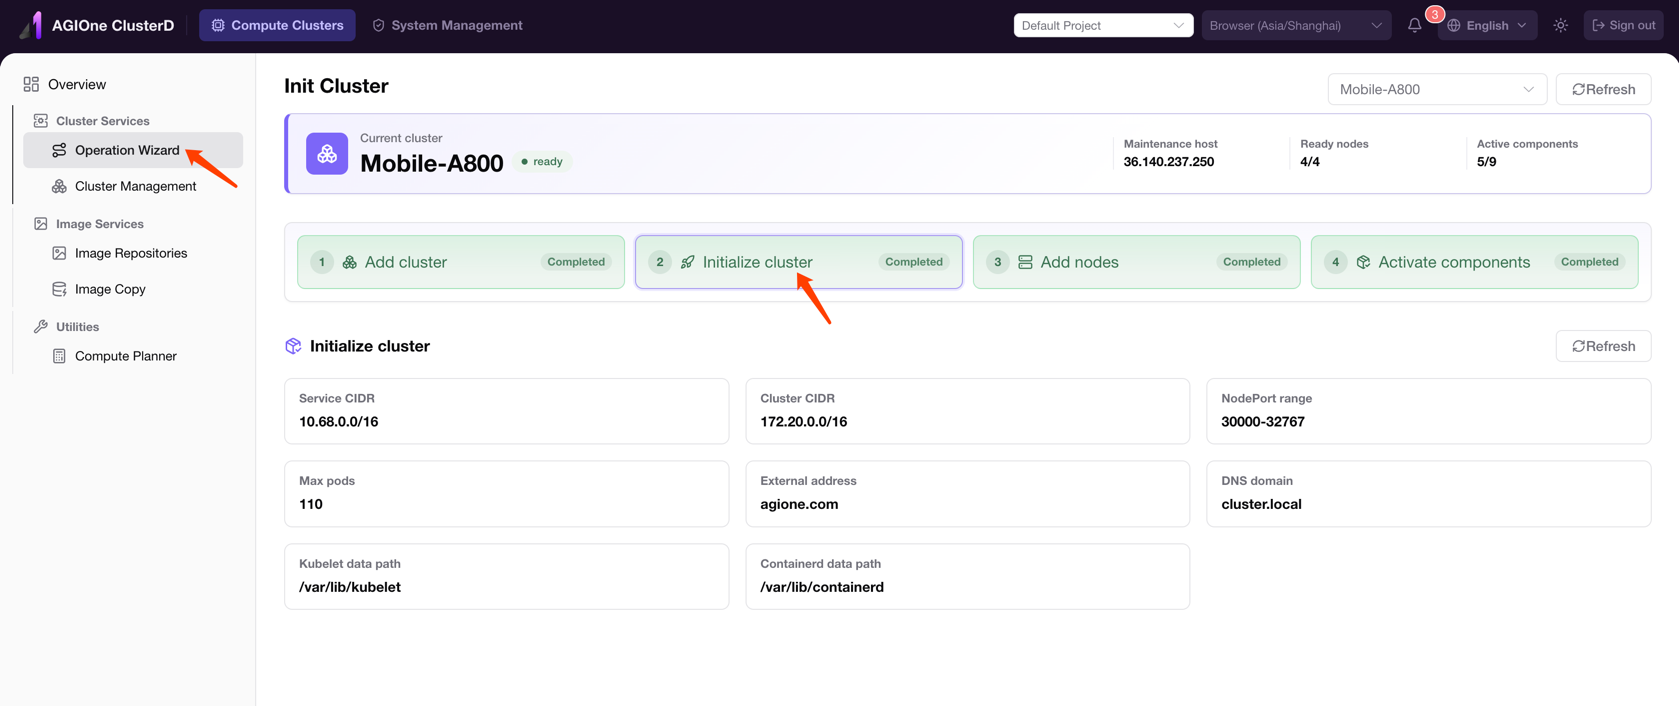
Configure the cluster network information as shown below. In most cases, you can submit and save the default configuration directly, unless Service CIDR or Cluster CIDR conflicts with the actual environment.
Add and initialize nodes
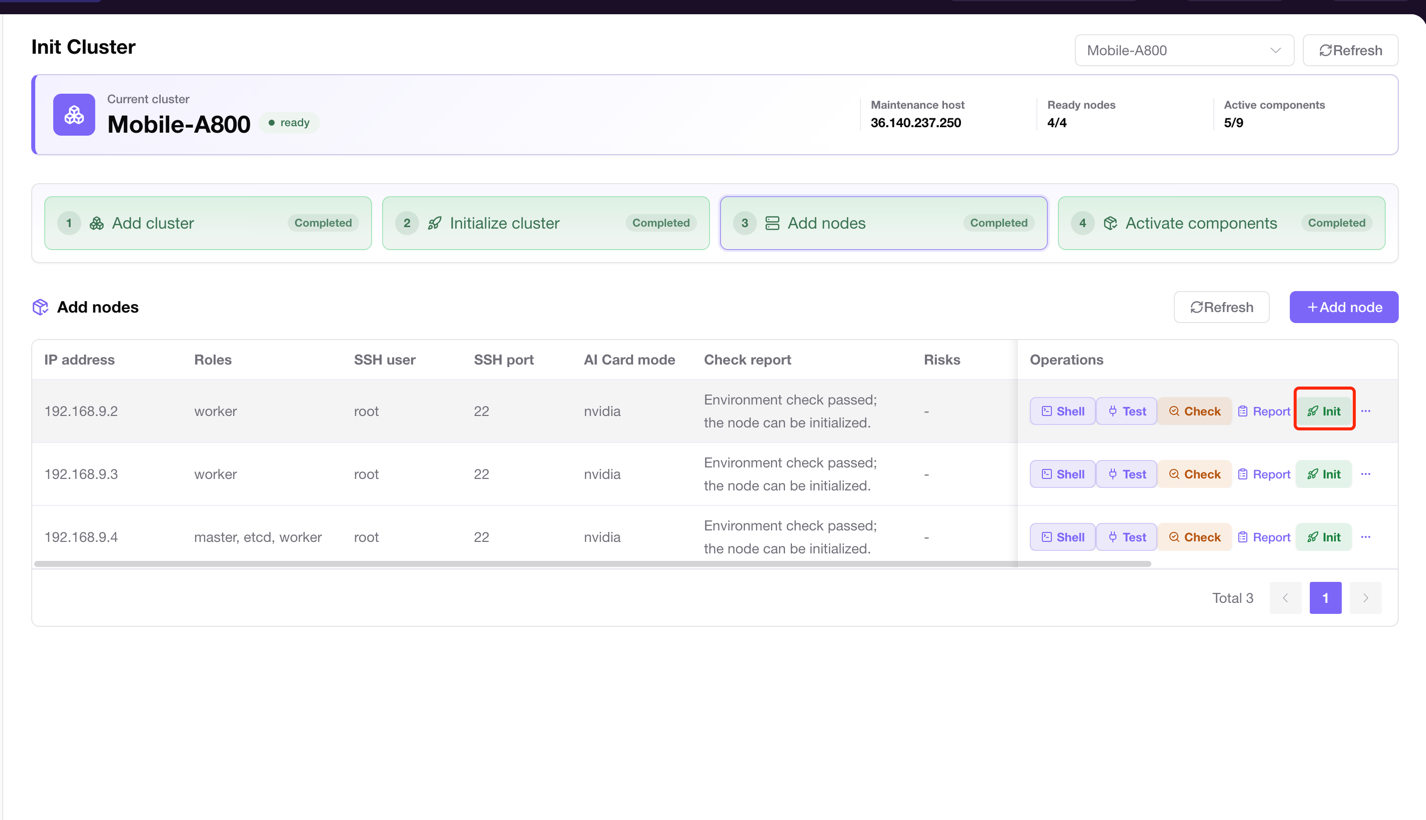
In the Add nodes step, click Add node.
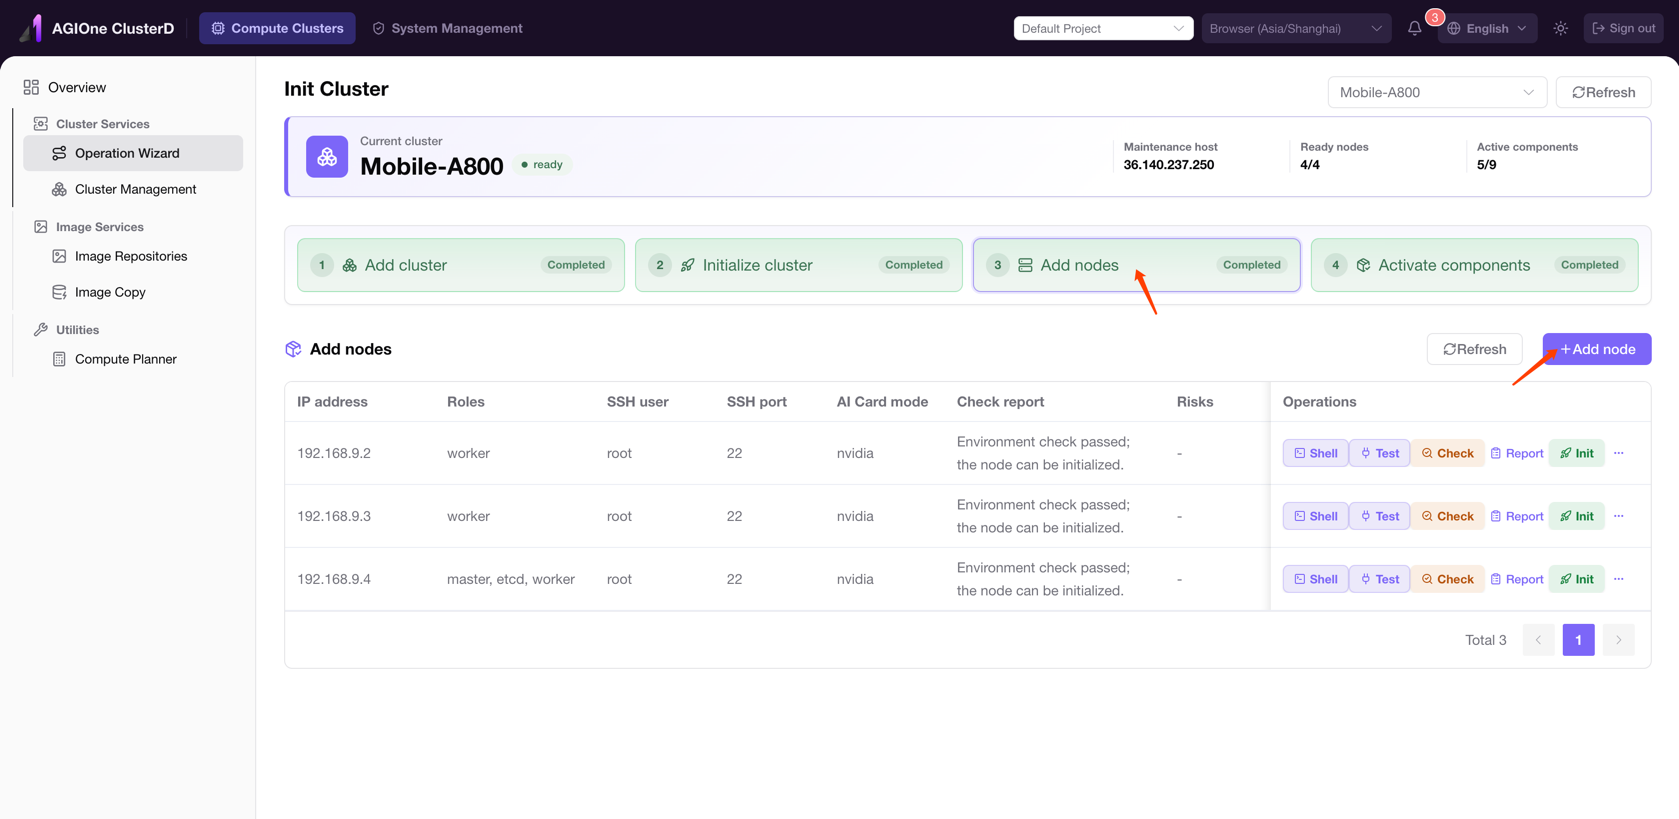
Enter the node IP address. This is usually the node's internal network IP. The Maintenance node must be able to access this IP address over SSH. The SSH credentials entered later are the credentials that the Maintenance node uses to access the corresponding node.
When fewer than three nodes are onboarded, at least one node must be selected to run the Master/Etcd services. When three or more nodes are onboarded, three nodes must be selected to run the Master/Etcd services.
Configure the GPU model for the node according to the actual hardware, as shown below.
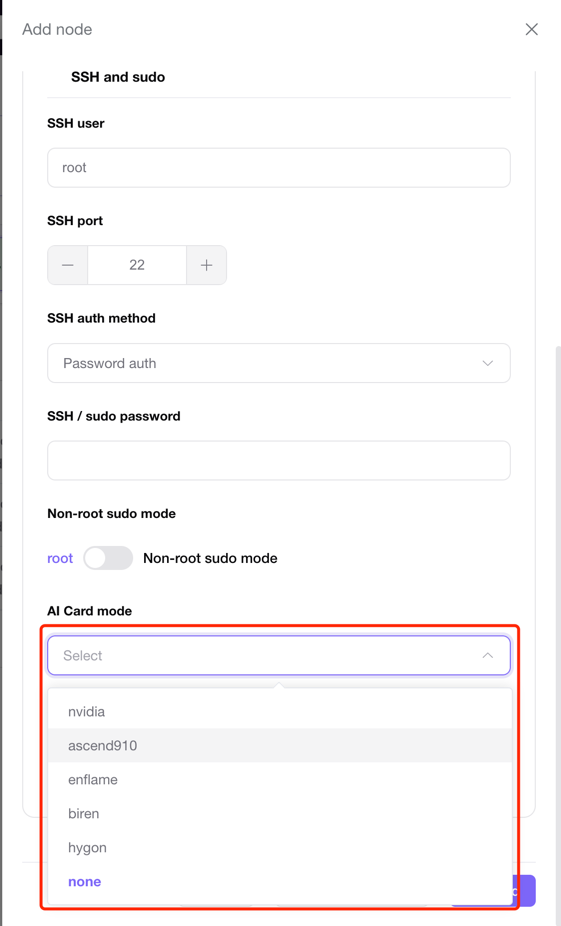
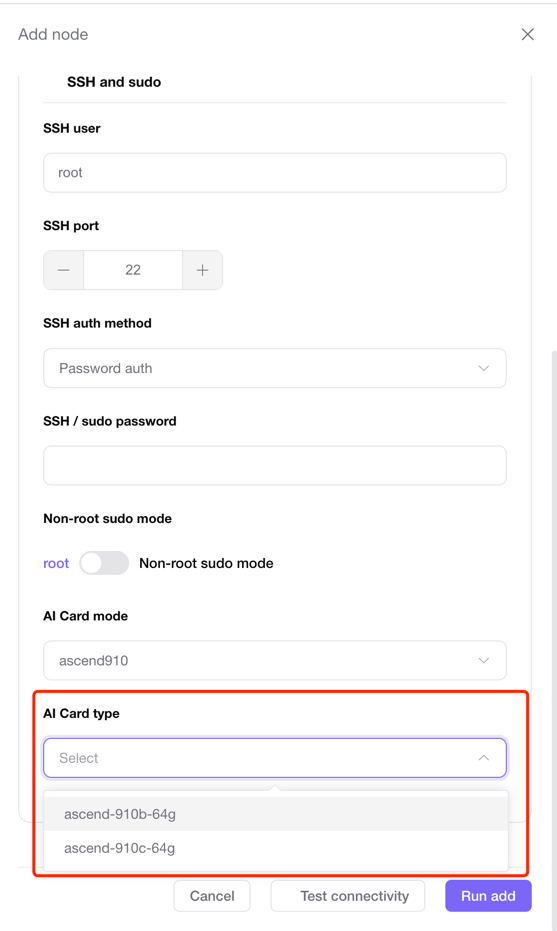
After adding the node, click Check to verify that it meets the deployment requirements, including checks for the chip, operating system, storage, and software.
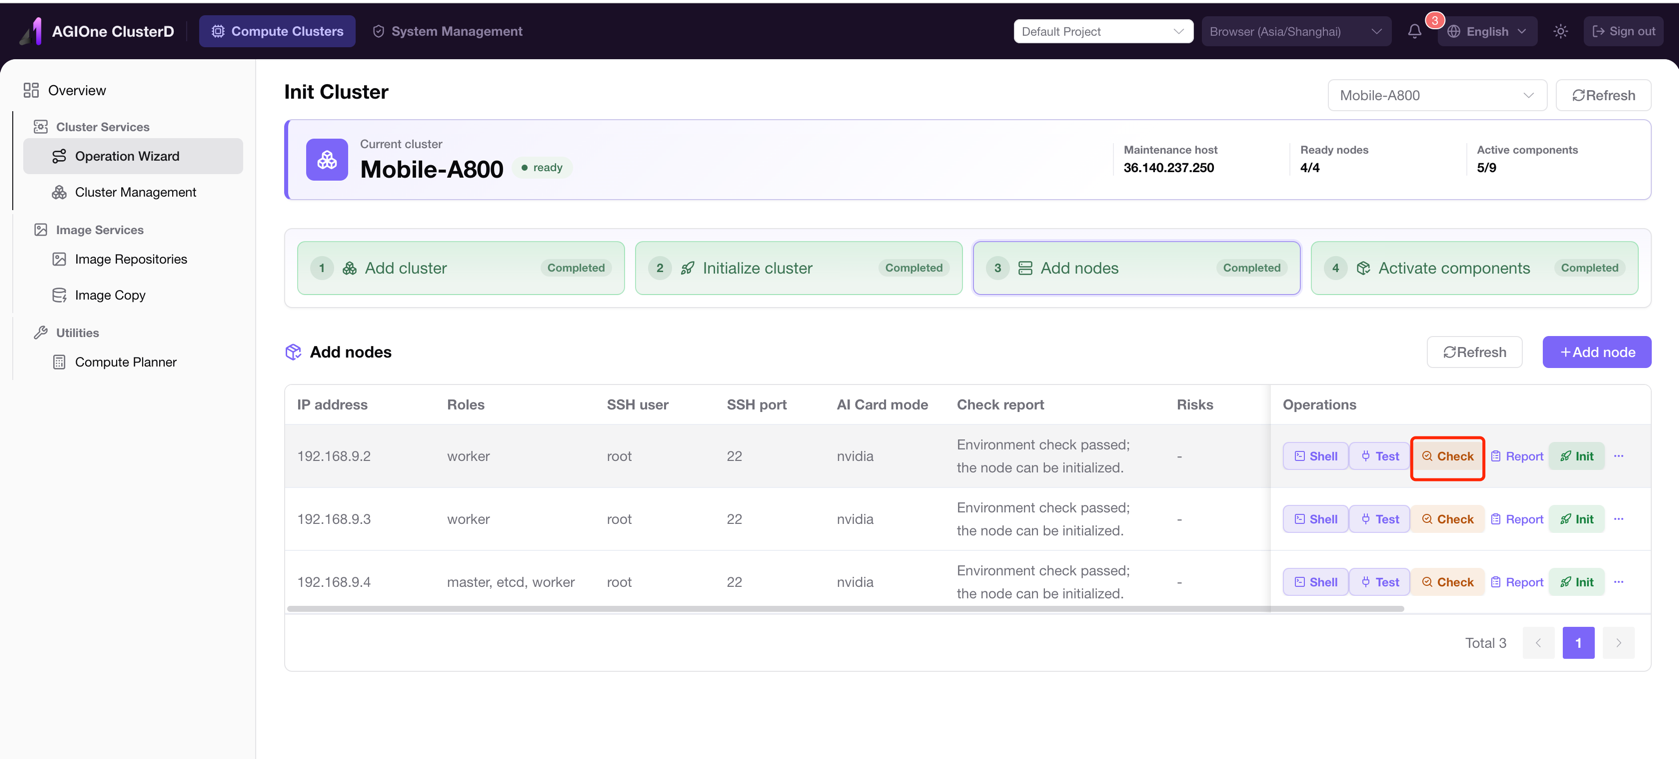
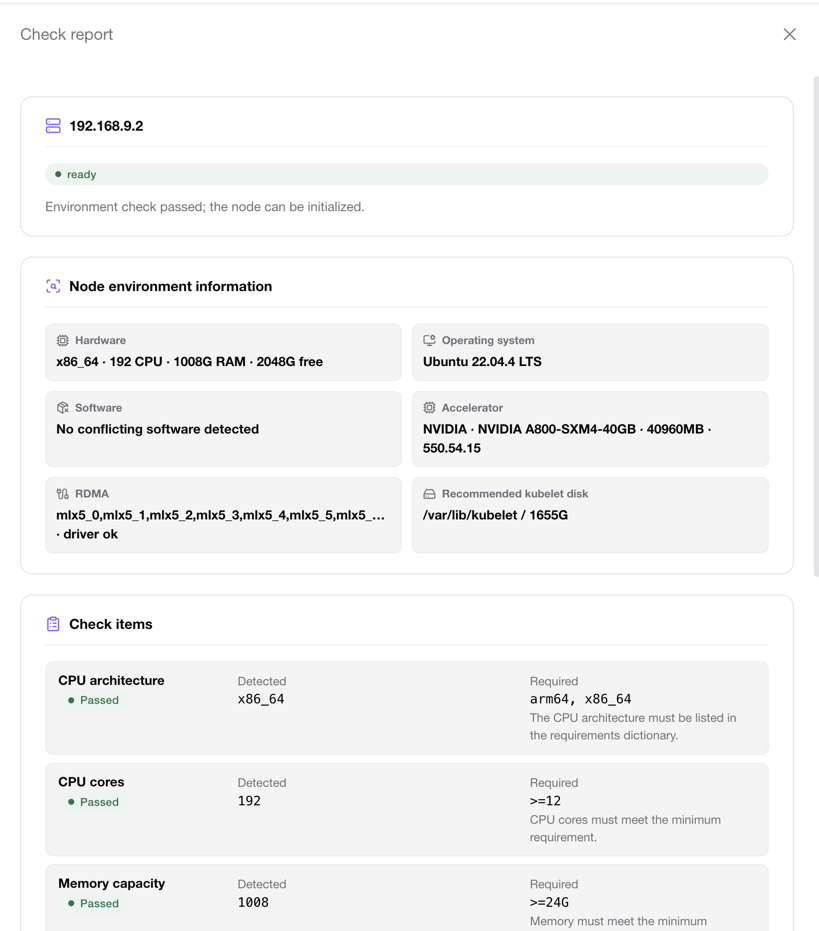
If all checks pass, click Init to install and deploy the node, then wait for the task to complete.
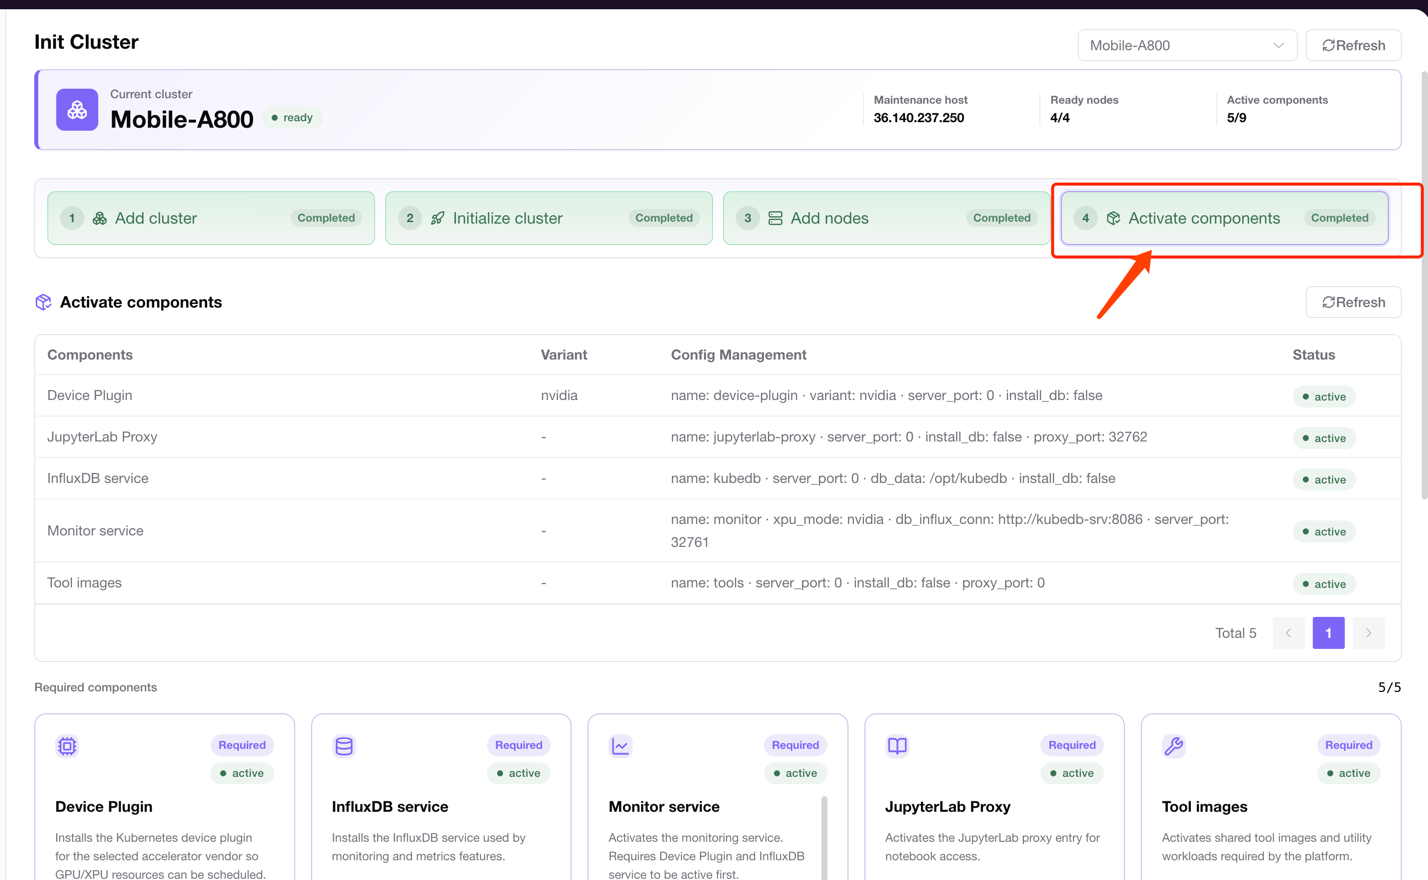
Activate middleware components
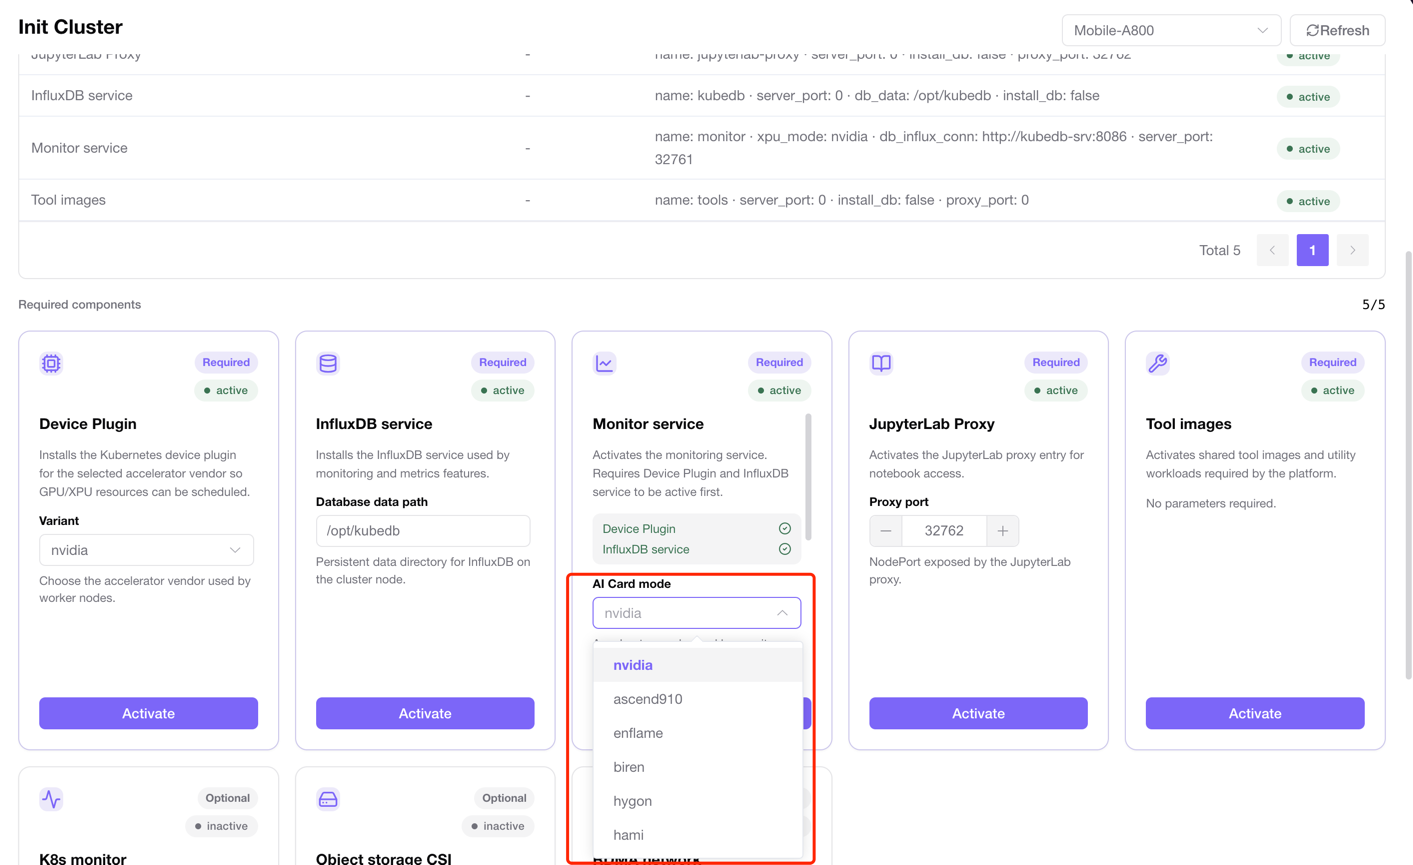
After the nodes are initialized, go to Active components. Components marked required must be activated.
Device Plugin: Select the appropriate plugin according to the chip type.
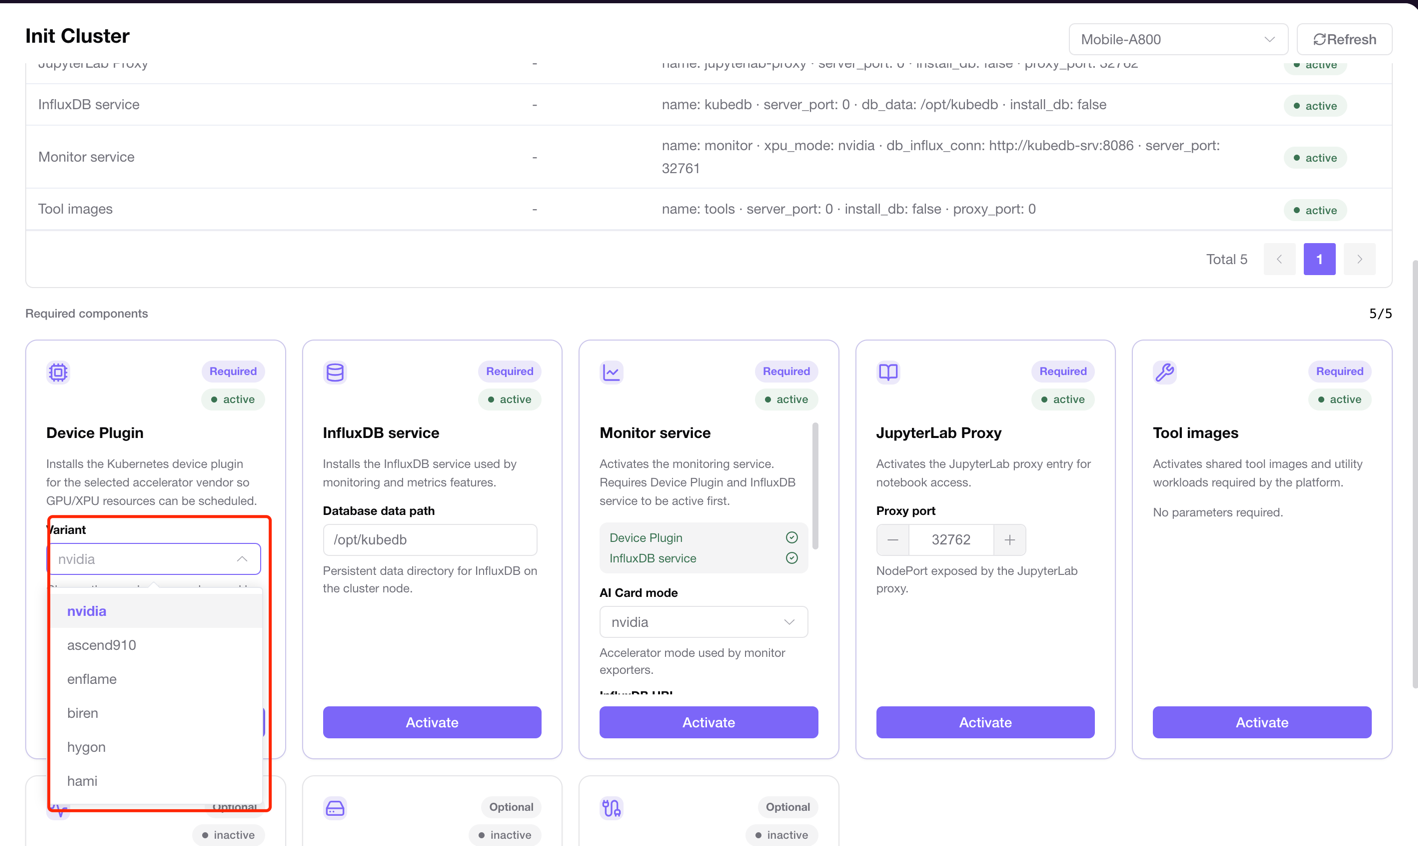
InfluxDB service: Click Activate directly.
Monitor service: Configure AI Card mode according to the actual hardware. The other options can be left at their default values.
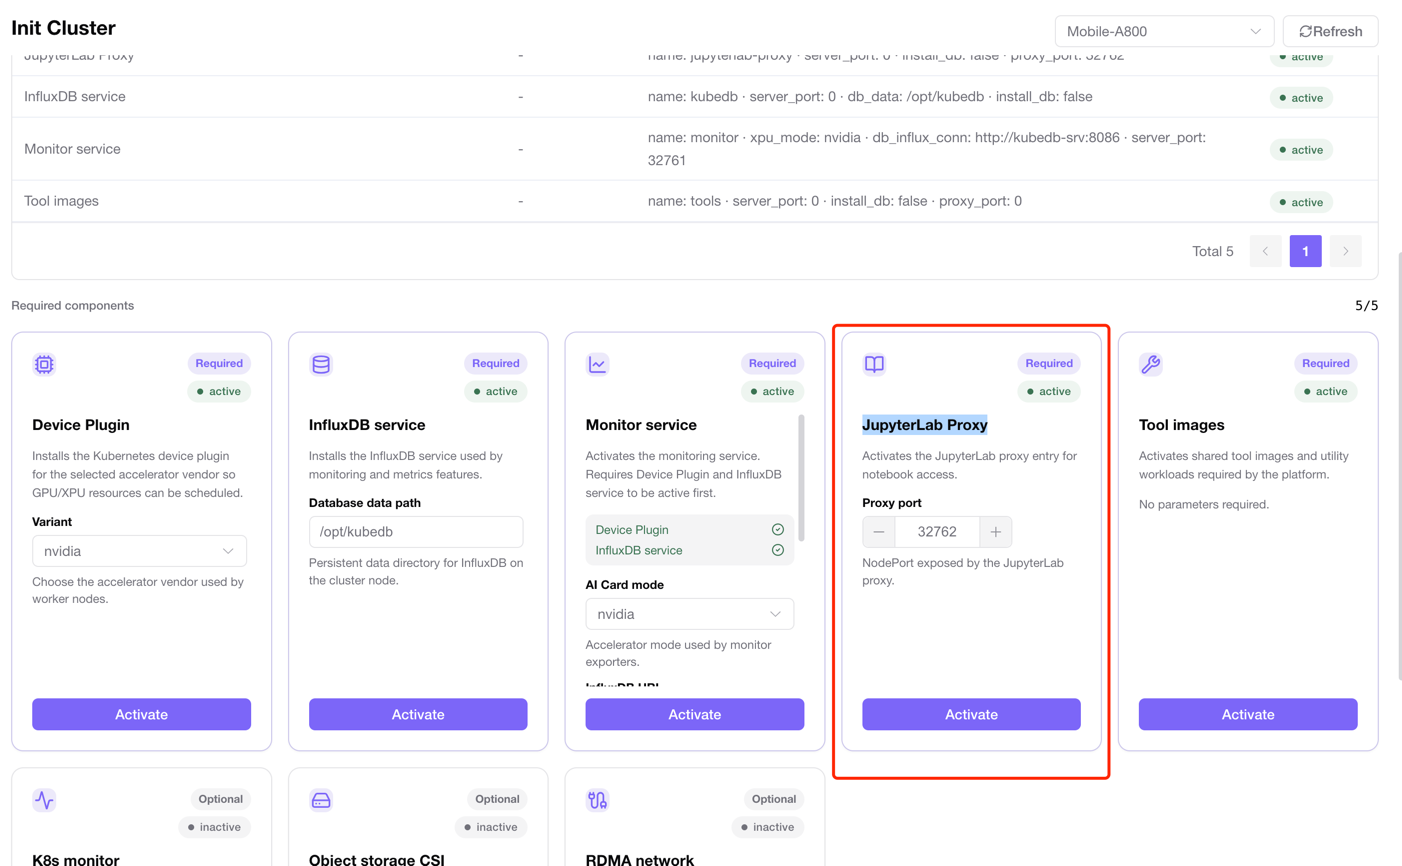
JupyterLab Proxy: Click Activate directly.
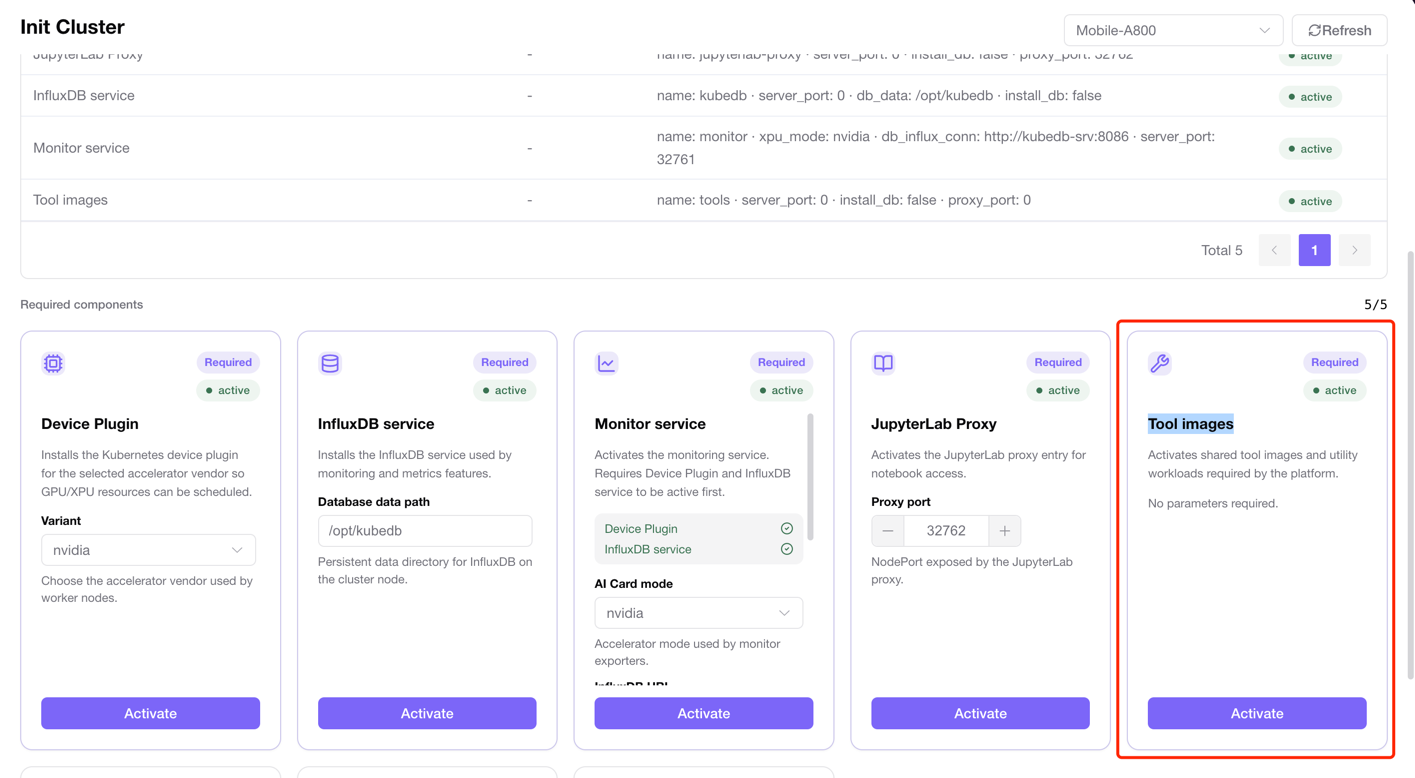
Tool images: Click Activate directly.
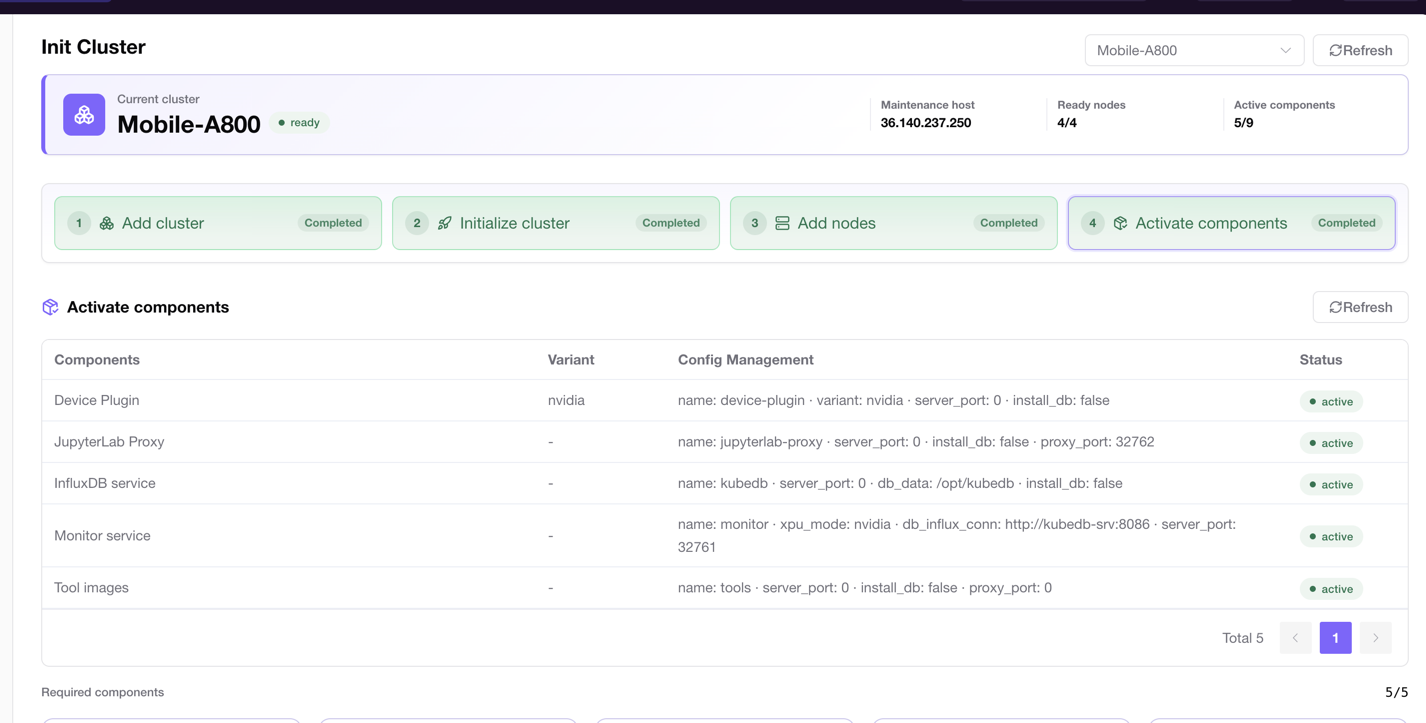
After all steps are complete, the following screen is displayed, indicating that the deployment has completed successfully.
Install the Image Service
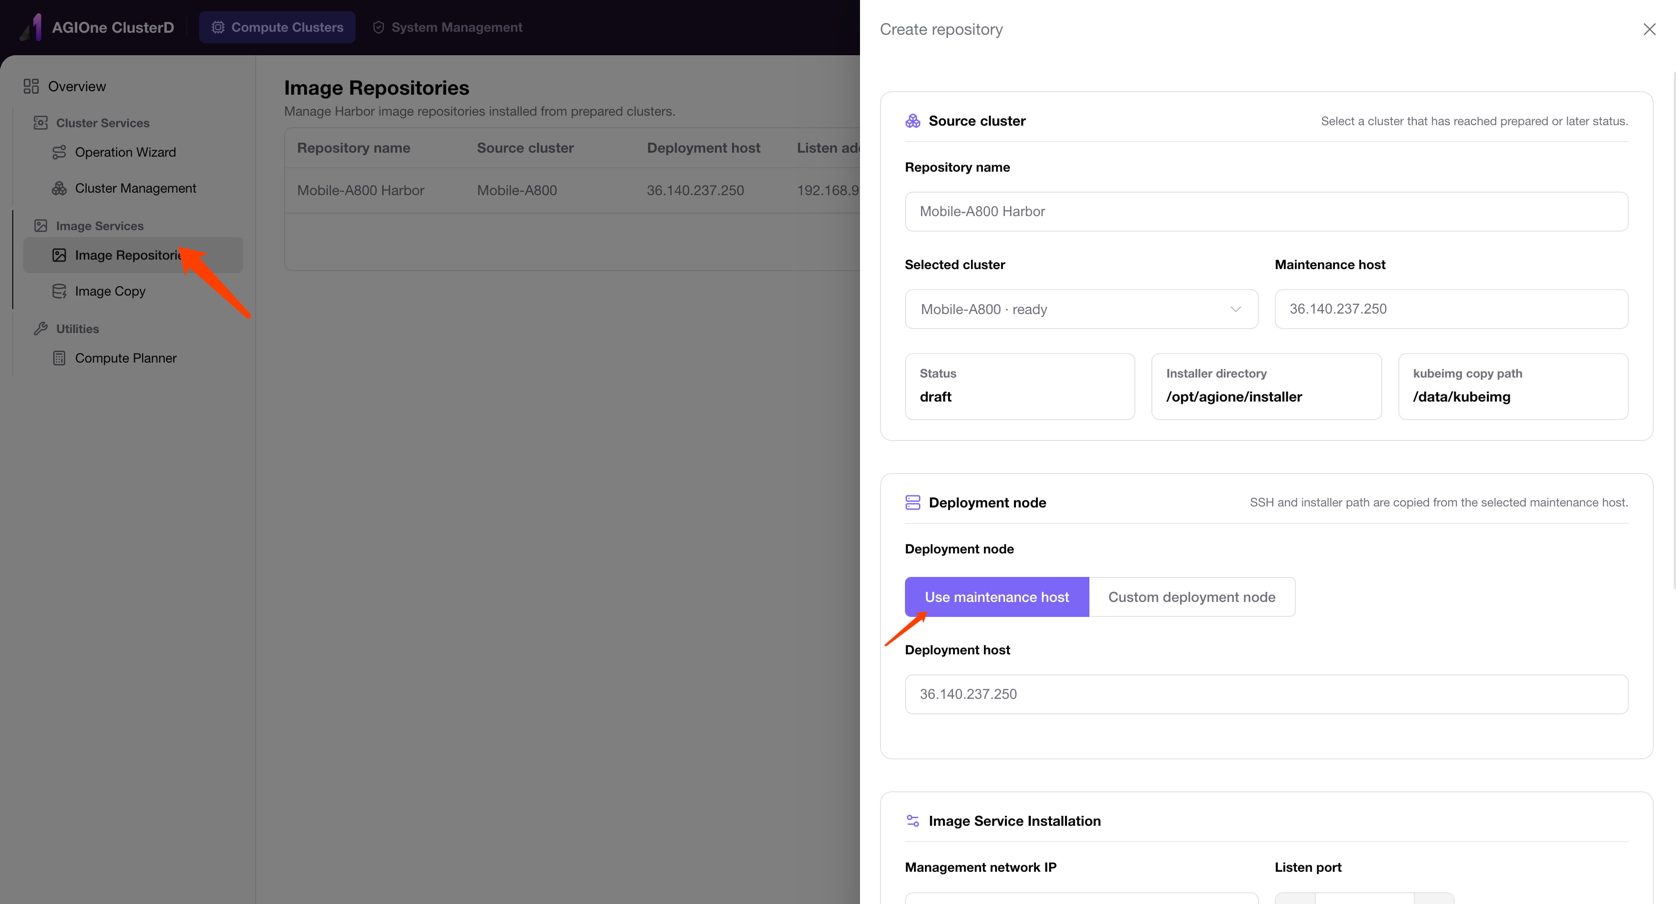
Configure image service deployment
The cluster must be configured with an image service. One image service can be shared by multiple clusters, or each cluster can have its own image service. The choice usually depends on network connectivity. In an all-in-one deployment, the image service is typically installed on the Maintenance node.
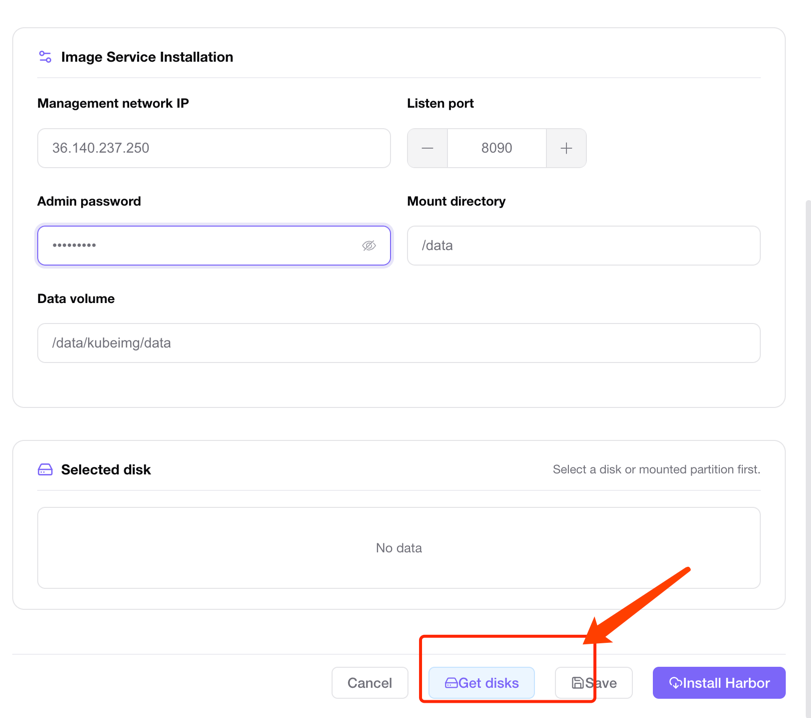
Click Get Disk to retrieve the available disks on the node. Select a disk with sufficient capacity—typically at least 500 GB—to store image data.
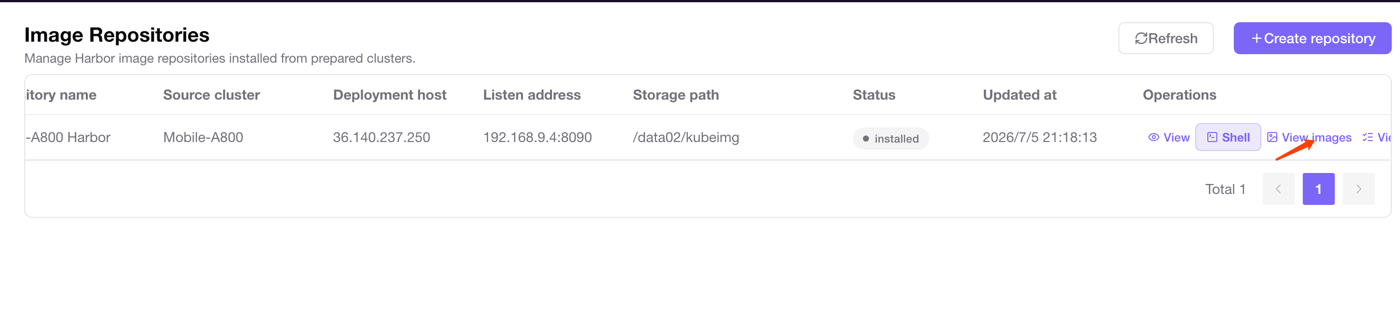
Click Install Harbor. After installation is complete, click View Images to view the image repository. The repository is empty at this point.
Copy images
After the image repository is created, you can copy images to the Harbor repository from the OneProHuaweiMP Huawei Cloud account's Hong Kong or Guizhou region, as shown below.
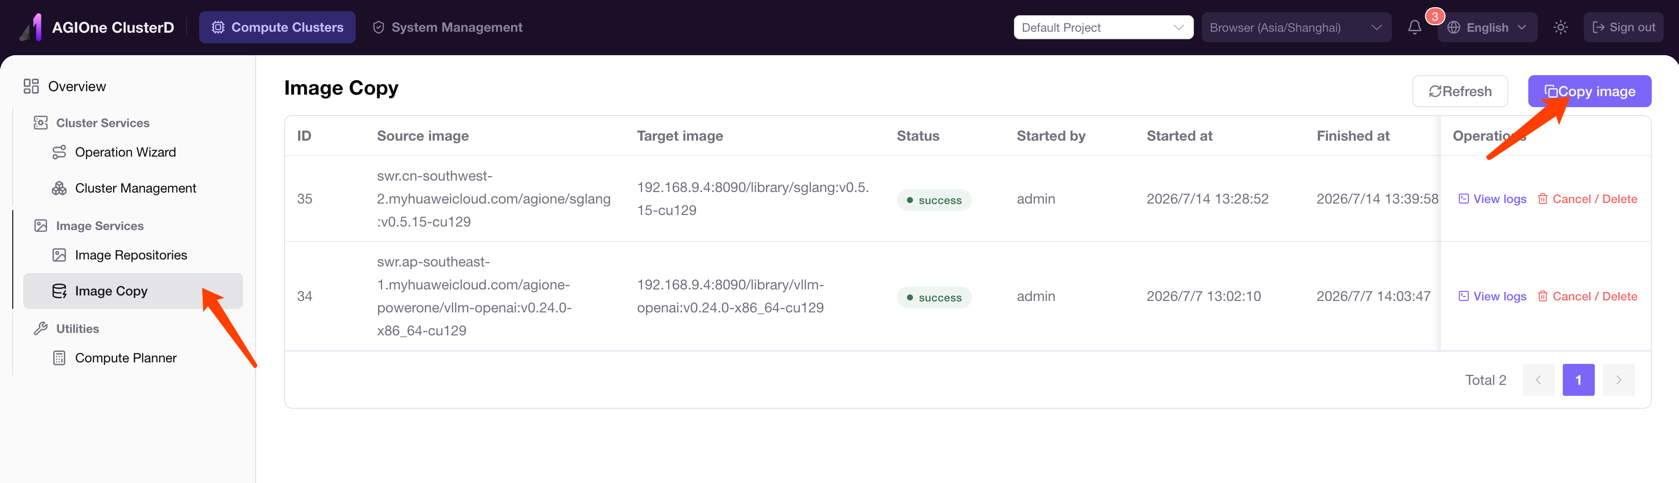
The remote repository contains commonly used inference frameworks. You can copy the temporary username, password, and repository information into the form.
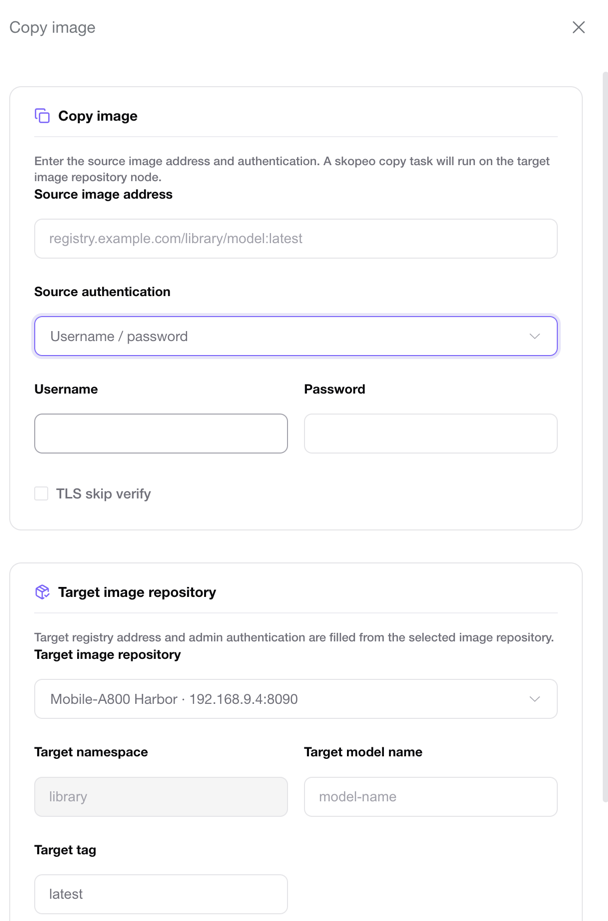
Submit the form and wait for the image copy operation to complete.
Notes
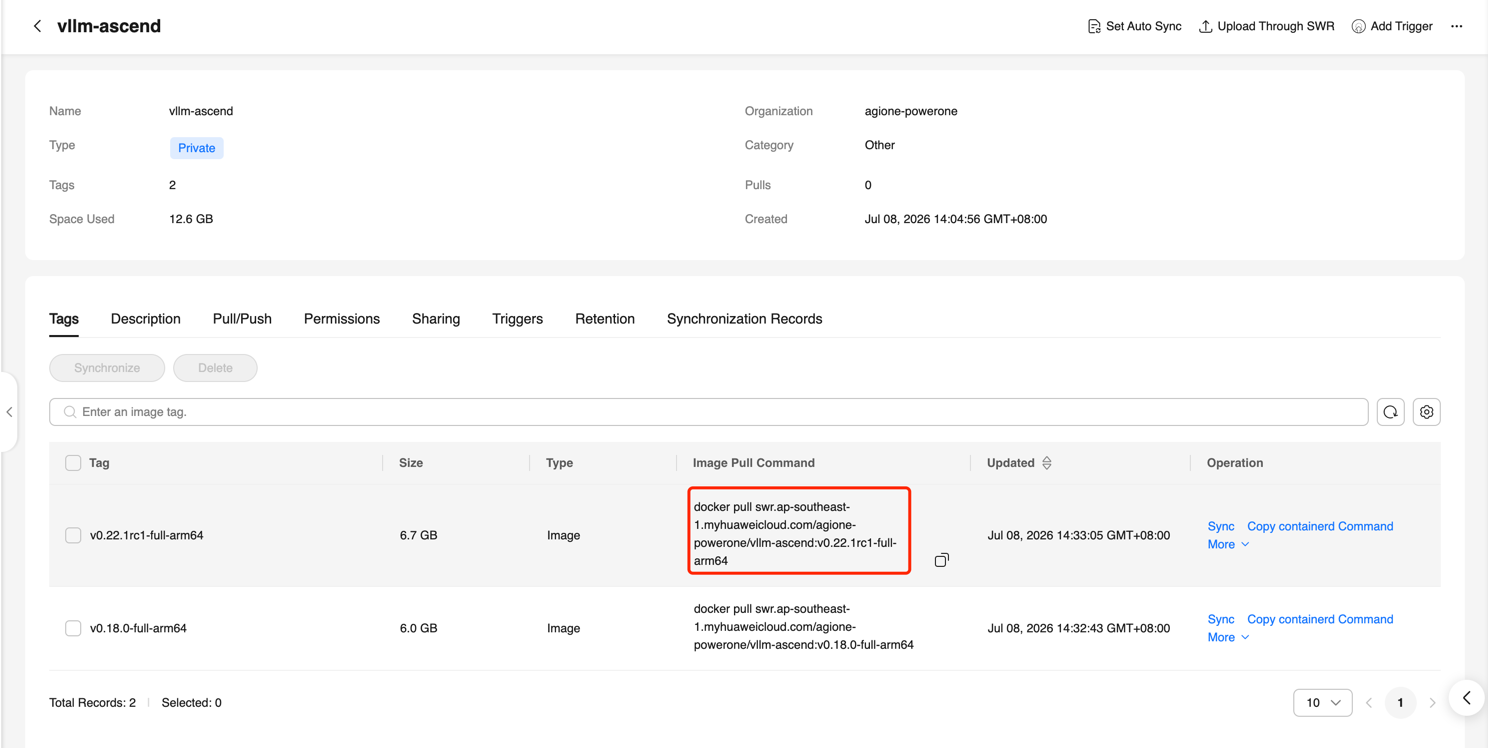
In the OneProHuaweiMP Huawei Cloud account, images under the
agione-poweroneorganization are intended for production use. Thevllm-ascendimage is for Huawei NPU cards;vllm-openaiandsglangare for NVIDIA GPU cards.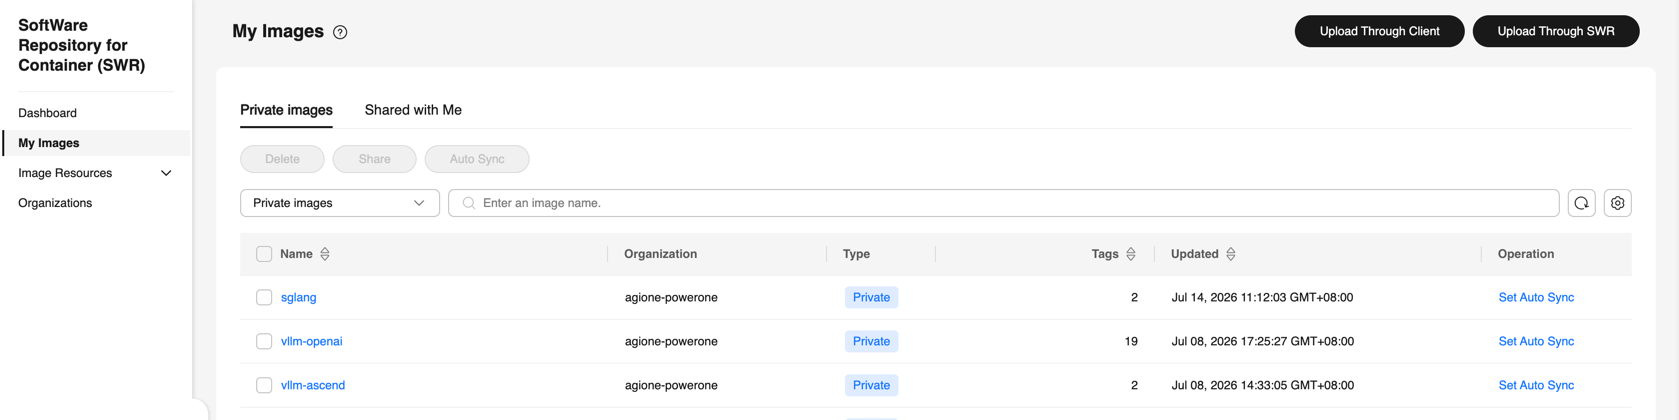
The following image shows how to obtain the relevant authentication information for the OneProHuaweiMP Huawei Cloud account.
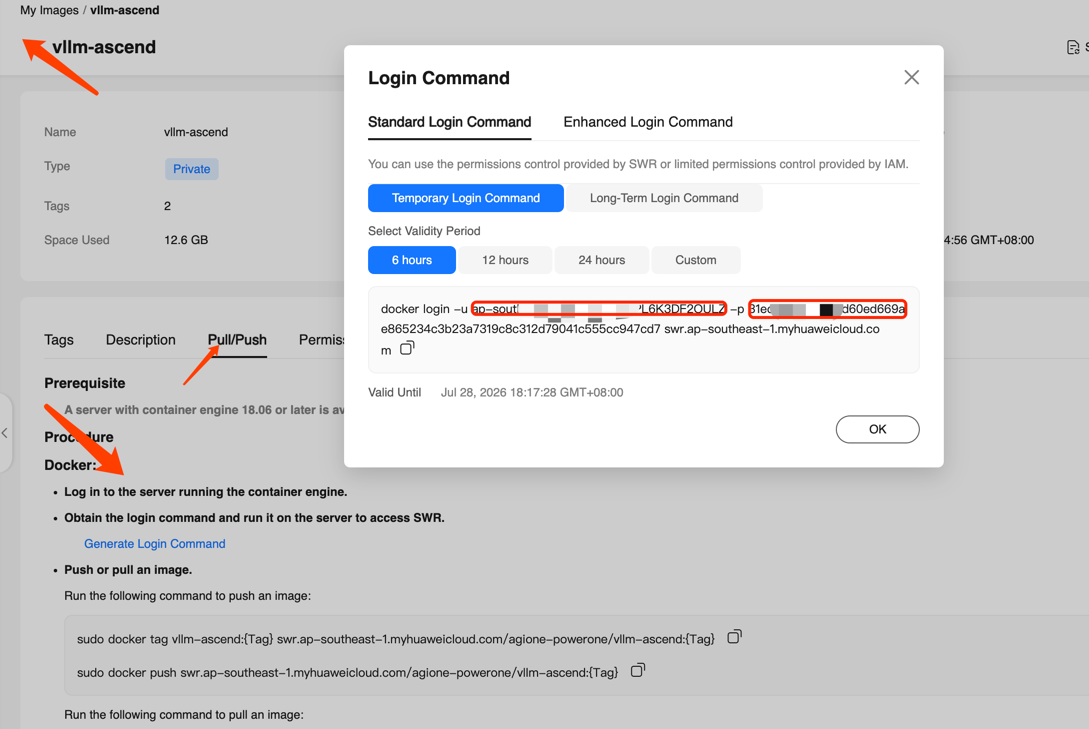
In the following image, remove
docker pullfrom the text highlighted in red to obtain the source image address.